1. Your phone’s built-in level
Before installing anything, check your stock camera settings. The level is usually off by default.
| Phone | Where to turn it on | What it shows |
|---|---|---|
| Galaxy (Android 15 and later) | Camera → Settings → Shooting guide → Grid lines & level | Grid and level; a circular level when you point the phone down |
| Galaxy (earlier) | Camera → Settings → Vertical/horizontal guide | Same guide lines |
| iPhone (iOS 17 and later) | Settings → Camera → Composition → Level | A broken line that turns yellow when level |
| Pixel | Camera settings → Composition → Framing hints | Level line with the angle, haptic when level |
The built-in level is free and needs no extra app. What it cannot do is let you choose how strict "level" is, and nothing about the angle is kept once the photo is taken.
2. Rotate after shooting
Google Photos has Edit → Crop → Straighten, and the Galaxy Gallery editor has a rotation dial. For photos you already took, this is the only option.
The catch: rotating leaves empty corners, so the photo has to be cropped inward. Straighten by 2° and keep the same aspect ratio, and you lose about 9% of the frame. The math is in straightening a tilted photo.
3. A level camera app
Below are real screens from the Android app "Level Camera".
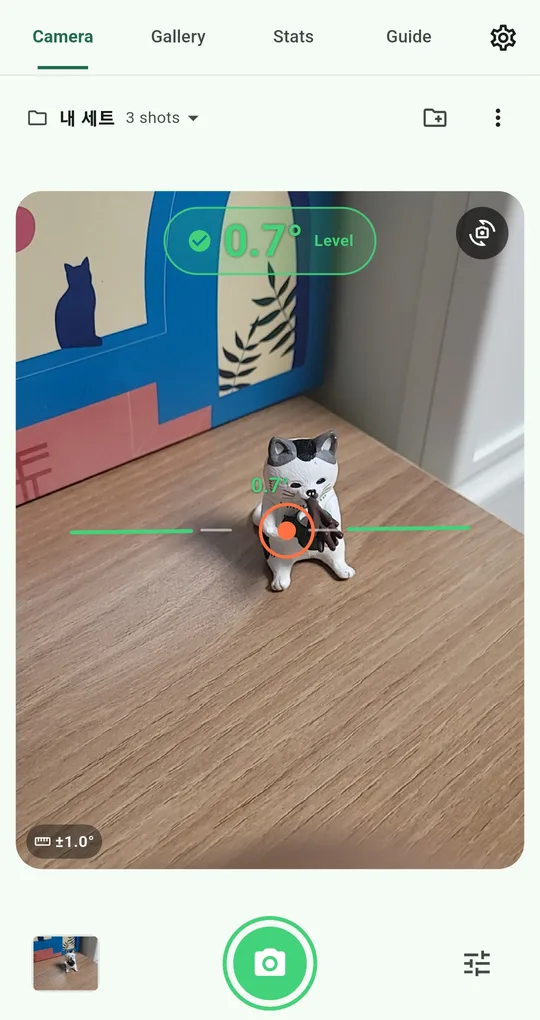
Level by the number
A level line and the current tilt in degrees sit on top of the camera preview. Outside your tolerance it says Tilted; inside it turns green and says Level, and the shutter ring turns green too. A short buzz tells you the moment you get there.
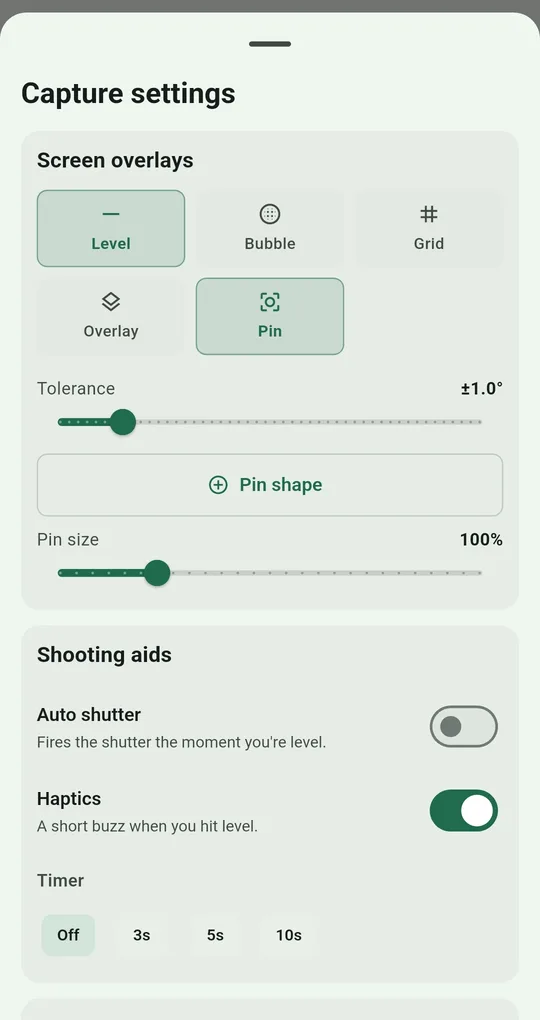
Set tolerance and auto shutter
Tap the slider icon at the bottom right to open Capture settings. Tolerance runs from ±0.3° to ±5°, and Auto shutter fires the moment you are level.
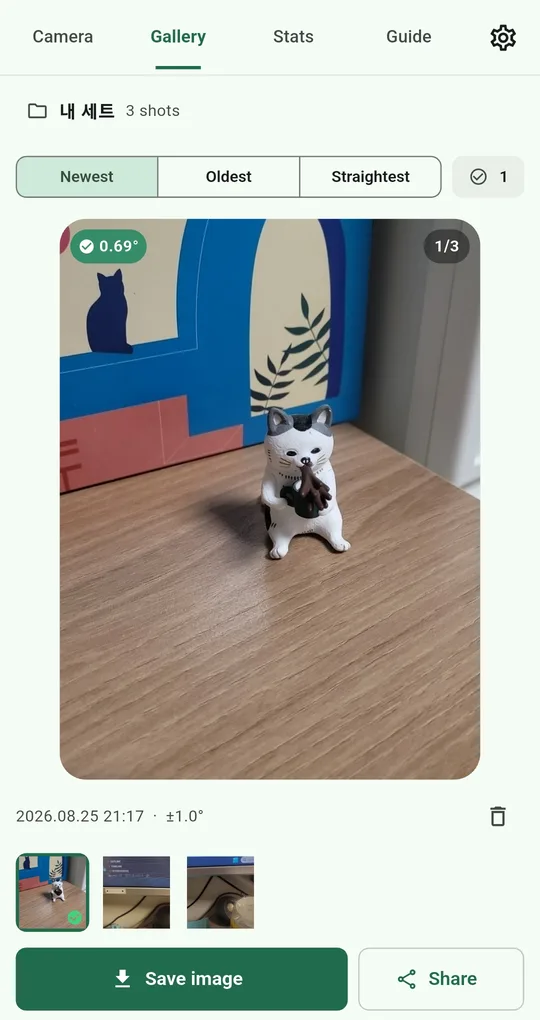
The angle stays with the photo
In the Gallery every photo carries a badge with the tilt it was shot at. Sort by Straightest or show level shots only. (The set in these screenshots was named in Korean before the language was switched.)
Side-by-side comparison
| Built-in level | Rotate later | Level camera app | |
|---|---|---|---|
| Angle in degrees | Varies (Pixel shows it) | Edit dial | Always |
| Adjustable strictness | No | - | ±0.3° to ±5° |
| Auto shutter | No | - | Yes |
| Lost resolution or framing | None | Cropped by the rotation | None |
| Angle recorded per photo | No | No | Yes |
FAQ
Is image quality the same as the stock camera?
It uses your phone’s camera, but not the stock app’s extra processing such as night or portrait modes. Use it where straightness matters (documents, listings, products) and the stock camera for mood shots.
Are my photos uploaded?
No. Photos and angle records stay on the device. No account, no login, no location permission.
Level Camera
No sign-up, and your photos and records stay on your phone. Free on Android.